Wednesday, May 30, 2012

Dollar Store Box Lantern

Looking for an elegant dollar store craft?
I made a beautiful and romantic lantern with materials almost completely obtained at the Dollar Tree.


I first did this some time back using the color theme of black and blue.

This time I did a white and silver themed one for the wedding contest over on the Dollar Store Crafts blog.

Materials:
4 picture frames 
Tissue Paper
Strong glue
Mod Podge 
Paint brush

The only thing not from the Dollar Tree is the Mod Podge.
The glue I used was a very strong glue I got somewhere else but hot glue would work also and that can be bought at many dollar stores.

For the wedding themed lantern I bought four 4x6 wood picture frames.
The only requirement on the frames is that the sides be as flat as possible because some need to be glued to the other frames. Otherwise size and color are totally up in the air.

Since I wanted silver I used white spray paint to prime the frames (after removing the glass of course!) then painted over with silver paint.


While the paint dried I used tissue paper I bought at the Dollar Tree and traced the glass onto it then cut out the squares.

Using a paint brush I brushed the Mod Podge onto the glass and carefully applied the tissue paper to it.

I set those aside and glued the frames together into a square.
 Once dry I put the glass back into the frames but left off the backing for the frames.

Now just put a candle or two in the middle and you have an elegant and crafty table center piece.
Lighted by a couple tea light candles

Lighted with a medium sized jar candle

If you want a bottom I would consider using one of the mirrors you can also buy at Dollar Tree. Just glue it on securely.

Depending on the frame you use you might also be able to drill holes into the frame to run thin wire or string through to hang the lantern.
Since more Dollar Tree stores are carrying ribbon you could use ribbon run through the top of the picture window to hang the lantern.

While currently we are deep into the summer wedding season, if you are planning a winter wedding I have also seen sturdy plastic snowflakes at the Dollar Tree and short lengths of battery operated Christmas lights. This idea would look great with the snowflake as the bottom and the light string providing safe, flame free light.

Monday, May 28, 2012

Memorial Day


Today is set aside to remember those, past and present, who have served and/or died for our country.
And by "for our country" we mean for our freedom and rights.

We take a lot for granted in our lives, those who risk everything for strangers, should never be on the "for granted" list.

So please, if on no other day, at least today, take a moment to consider those who have given their all for you. Thank an active or retired service member. 

Freedom is not free, it comes at a great price to many.

My Father when he was young and in the army and the flag that was over his casket when he died nearly 11 years ago.

Friday, May 25, 2012

Deliciocity Friday: Taco Salad

I got this recipe from my dear friend Medrith, who I believe she said she got it from her Mother-In-Law.
I have tweaked a few small things though.

Ingredients:
1 Head lettuce
1 Tomato
1 Can olives
1 Can chili beans
1 Cup shredded cheese (approx)
1 Cup whipped salad dressing (approx)
1/2 Cup ranch dressing
Nacho cheese chips
 Taco seasoning package (optional)

Chop or tear the lettuce into smaller pieces and put into a large bowl.
I chop about half the tomato and set aside because hubby likes tomatoes, I can't stand them.
Next drain and chop up the olives.
Drain most of the liquid off the beans and add to the bowl with the olives and lettuce.

Mix in the cheese, whipped salad dressing (miracle whip) and ranch.
Adding the ranch was one of my edits and not required, just gives a little extra flavor.
Another one of my adds was the taco seasoning. I probably add about a tablespoon or a bit more.

For the chips I usually crush them in the bag but only add them to the individual plates, this keeps them from getting too soggy. If all of the dish is getting eaten quickly then it's safe to add the chips to the dish.

Easy and delicious. Makes a great dish for when it's too hot so you don't want to slave over the hot stove! (aka all of summer hehe) 

Wednesday, May 23, 2012

Photography Backdrops

Recently I wrote about using some fabric, a bunch of flowers and hot glue to create a "flower bed" for baby pictures.

Another money saving photography tip is to make your own backdrops.

Buying a backdrop will often run over $100.00 dollars a piece.
I make mine for 20-40 dollars.

Go to your local fabric store (I developed this idea when working at Jo-Ann's so I can tell you that the materials are there) and find the quilters section.
There you will find muslin.
This is usually white or cream (sometimes black) and is used for making complicated quilts.
 Buy a big piece.
Bigger is better.
Muslin comes in various widths. 
I like to get the 140 inch and buy two yards.
If you get from Jo-Ann's I'd encourage finding a coupon. They are always around and can save big money.

Then buy one of the large bottles of fabric dye.

Now dye like usual.
If you wad it up and hold with string you'll get the patterns that look nice without being distracting.

Pin to a wall or build a sturdy holder frame out of pipe and set up for pictures.


I have at least five backdrops in various sizes and colors and probably spent the same or less then buying one straight out.
 

Monday, May 21, 2012

In Stitches

I remember sewing when I was 6-7 years old.
So I feel like I've always known how to sew.
I used to only sew once in a while.
Then I worked the cutting counter of Jo-Ann's Craft and Fabric store.

It went downhill from there.
By "it" I mean my ability to not buy a bunch of fabric.

Seriously, so many beautiful fabrics passing through your hands everyday, how do you not get addicted!

Now I sew a lot.
I make my own patterns.
I make my own skirts and some dress shirts.
And if you've paid much attention to this blog you know that I've been sewing more lately to try to make things to sell because I need a little extra money here and there.

So since this round of Iron Craft called for some form of stitching I knew I would have my pick of projects!

I opted to make a fabric billfold from a pattern I created a little while back. 

The pattern is simple, all the areas that have to be sewed is what makes it take a while to complete.

I made a red and black paw print one to sell and a black and blue striped one for myself.

It has six pockets for things like credit cards, business cards, etc. and two pockets for stuff like cash, receipts or coupons.
I know it looks a bit orange but it's all red and black

I really love this billfold, it's got lots of room yet I can stick it in some pants pockets and of course the fabrics make my day also! hehe 
The outside is the same as the fabric at the bottom
 

Friday, May 18, 2012

Deliciocity Friday: Peanut Butter Chocolate Bars

Few things go together as perfectly as peanut butter and chocolate.

These bars are no bake, fairly easy but very rich so cut them small to easy your guilty feelings for the delicious indulgence! hehe

Ingredients:
1 stick butter (half a cup)
2 cups crush graham crackers (about 1 sleeve)
2 cups powdered sugar
2 Tablespoons honey
1 cup creamy peanut butter

Also:
1 & 1/2 cups semi-sweet chocolate chips
1/4 cup creamy peanut butter

Crush the graham crackers.
One way is to put them in a large ziplock bag and roll over with a rolling pin.
If you're having a bad day feel free to throw the crackers in the ziplock bag at the wall a few times.
Free stress reliever!

In a medium bowl melt the butter then add the cracker crumbs and mix throughly.

Next add the powdered sugar and peanut butter and mix well.
Add in the honey, stir the press into an 8x8 baking pan (or something close to that).

Put the chocolate chips and peanut butter either in a double boiler or microwavable bowl.

If you use the microwave method only cook for a few seconds at a time, then stir, chocolate can burn in the microwave.
In a double boiler keep on low heat and constantly stir till melted.

Pour on top of the peanut butter and graham cracker mixture and smooth out to cover.

Refrigerate long enough to harden the chocolate (at least an hour). Then dig in! 

Wednesday, May 16, 2012

Photography "Flower Bed"

Besides crafting, sewing and baking, another love of mine is photography.

I have been shooting professionally for over seven years. Mostly weddings but also nature, kids, families, etc.

I'm not rich and I keep my prices low to help out people on a budget so I don't have a lot of money to throw around. So I make a lot of my backdrops and props.

I have long wanted a "flower bed" that would be great for newborn pictures.
However, to buy one is _expensive_
So recently I made one.

A piece of soft pink fabric, about 13 bunches of fake flowers, and a bunch of hot glue later!...

Now I just need a newborn baby girl in the Nashville, TN area to photograph! hehe


Monday, May 14, 2012

"God Made You" Painting

I recently decided to make an inspiring painting.


I got a canvas and covered it in black paint.
Then with white paint I carefully painted the words onto the canvas.

It starts with "God Made You" then has a list of kind, loving words that I think God has in mind when He makes one of His children.

I like how it turned out. I think I'm going to hang it in my hall so I can see it all the time.

"I praise you because I am fearfully and wonderfully made; your works are wonderful, I know that full well." -Psalm 139:14

Wednesday, May 09, 2012

Apron For Charity

As I previously mentioned here the group "Craft Hope" is currently collecting handmade aprons to send to the women of Haiti.

The second apron I made is a little more involved but still not too complicated if you have done a little sewing before.

If you go the route of fat quarters you could make this in about two and a half fat quarters.
I made it with extra fabric I had around.

I wanted this apron to be able to fit a larger woman (beauty comes in bigger packages too!!).
So I cut four pieces of fabric measuring 8 inches wide by 22 inches long.

I picked three fabrics that matched well and just cut two rectangles out of one fabric.
For mine the two outside pieces are a tiny blue and white gingham, there is also a medium blue panel and a panel that is white with tiny orange, purple and blue flowers with some greenery. The pocket is out of the flowered fabric and the ties are out of the gingham.

I also cut a piece 11 by 8 inches for the pocket. And two pieces 30 inches long by 3 inches tall for the tying strings.

I laid two rectangles together, facing each other and sewed down one long side.
I separated those two and laid another down and sewed it along the long side. I kept doing this till all four were sewed together to make one big square.

Next I went around all the outside edges and folded in towards the back about 1/4th of an inch, then folded again and sewed. 

For the pocket I did the same fold over and sew around all sides as I did to the main apron part. 
Then I centered it on the apron and sewed the sides and bottom down.

For the tying strings I folded the fabric in half so that it was now one and a half inches wide. Then folded both edges in about 1/4 of an inch and sewed. 
If it helps you can iron your fold to help them stay in place.

To finish I sewed one end of the tying strings to the top of the right and left sides of the apron.

From one end of the strings to the other is 86 inches on mine. This will fit a larger lady or give plenty of tying room for a smaller lady.

If you can sew a straight line make an apron and help others!

Monday, May 07, 2012

Iron Craft Think Inside The Box

This round of Iron Craft had to do with boxes.
Craft something that is boxed themed.

I kept coming back to the paper boxes I used to love to make in 5th grade.
I spent all my free time making those boxes.
I even created a "Russian Doll" effect out of paper boxes, going from smaller then the end of my pinky finger to a box 4-5 inches across.

I haven't even thought about these boxes in _years_ but they kept coming to mind and I wondered if I still remembered all the steps.

Turns out I do!

Start with a regular 8x10 sheet of paper.
Fold diagonally from one corner and cut off the excess of the paper so that you get a square of paper.

Unfold your original fold and make an identical fold on the other corners. Crease then unfold.
Your square should have four triangles made via creases in the paper.

Take two opposite points and fold into the middle of the paper. 

Then fold in again.

Now unfold and do the same to the other two points.

And unfold. Sounds weird I know but now you have a square of paper with little square creases all over it. Now it starts getting complicated to explain. Hopefully the pictures clear it up.

Pick two opposite corners, move out one square from the corner and make a straight cut going in two squares. Do the same on the other side of your point and across from the two cuts.
See the little gray lines? You'll cut there.

Now fold in the two corners you did not cut, in two squares. And fold the outer sides of that in twice to create "flaps".

Now the points where you did cut will fold in and over your flaps.

Just a little stick glue or tape will hold everything in place.

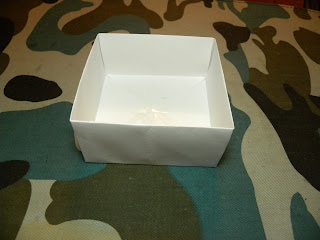
And there you have a small paper box. If you make it with more sturdy paper or scrapbook paper you could use it as a pretty box for odds and ends (hair clips). These I'll probably put a little note for my hubby.


Friday, May 04, 2012

Deliciocity Friday: Chocolate Chip, Peanut Butter Cup Cookies

This is one of my semi-homemade ideas.

Chocolate Chip Peanut Butter Cup Cookies.
 
I started with a bag of chocolate chip cookie mix and the ingredients it called for.
I also used 10 small Reese's peanut butter cups.

Using a sharp knife I cut up the Reece's cups, but not too finely.
Next I prepared the cookie mix as directed.

I folded the chopped cups into the cookie dough then spooned onto the baking sheet and baked as directed.

A rather simple addition but so good. 
It adds just a hint of peanut butter flavor without being too dense.
For the last bit of dough I also added a little creamy peanut butter just for a little extra kick.

Wednesday, May 02, 2012

Ribbon Organization

I've seen many ways of organizing ribbon.
Some weren't for me.
Some required too much spending for my taste.

Recently while at the Dollar Tree I saw some cute square baskets that I thought might be my key.

Turns out they work great!
Since it's the dollar tree each basket was only $1.00 and besides that all I needed was a thin dowel rod (or kitchen skewers).

I ran a wooden rod through the holes on one side and ran a bunch of spools of ribbon on the rod then out a hole on the other side of the basket.

Now all my ribbon is in a couple baskets (organized by type of course!) and I can easily grab the basket I want and take it wherever I am working on my crafts.

Definitely the best option I've seen yet to clean up and organize ribbon collections.